


Raspberry Pi - Installing a RS232 Serial Port


Attention
A new article has been posted that provides additional RS232 serial interface options, hardware, and wiring digrams.
If you are trying to connect to a Raspberry Pi Compute Module Development board then see this article:
Do you need your Raspberry Pi to talk to serial controlled devices? Do you need to access the Linux shell when you don't have a network connection and don't have the ability to connect the Pi to a keyboard and monitor? Do you want to add more geek cred to your Pi by having a series of wires leads dangling from the GPIO header? If the answer to any of these questions is YES!, then this is the post for you!
Adding a RS232 serial port to the Raspberry Pi is actually quite simple. Add you need is a RS-232 level shifter and a four wire leads to connect to the GPIO header. So .. what a level shifter you ask. A level shifter is a circuit that can take the low voltage (±3.3VDC) TTL signals for serial transmit (TX) and receive (RX) from the UART on the Pi and shift them to ±5VDC the voltage signals required for RS232 standard communication. Want to know more? Click here.
There a many level shifters out there and the information here can be used to adapt any of them for you Raspberry Pi, but for wiring schematic and the illustrations used in this article I will focus on one that I had laying around the house available from XBit Electronics.
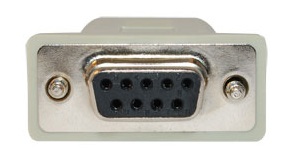
Xbit Electronics - RS-232 Level Shifter with DB9 Connector
Note: The Xbit RS-232 level shifter is no longer available. Any RS-232 level shifter that supports an input voltage down to 3 VDC should work juts fine. Here are a couple of examples:
;) (click image to enlarge)
(click image to enlarge);)
I used the following jumper wires to connect between the level-shifter and the Raspberry Pi GPIO header. The Xbit level-shifter comes with a 5 pin header that you can solder directly on to the circuit board. Mine is soldered on to the bottom of the level shifter so that I can insert it directly into the prototyping breadboard. If you are not using a breadboard, then it is probably more convenient to solder the 5 pin header to the top of the Xbit circuit board.
I also used a prototyping breadboard to make my connections, but you could just as easily solder leads to the level-shifter if you want a more permanent solution. Do not solder wires to the GPIO header, that is not a good idea. Use either these prototype push pin connectors or a press-fit connect to interface with the GPIO header.
;) (click image to enlarge)
(click image to enlarge)
This level-shifter uses a source supply (VCC) voltage of 3.3-5VDC. Fortunately the Raspberry GPIO includes a pin that provide the 3.3 VDC neccessary for the VCC connection on the level-shifter. The next three wiring connections are as simple as it gets ... Ground to Ground, TX to TX, and RX to RX. A wiring diagram and close up photos are included below to help provide a clear picture of the connections.
;) (click any image to enlarge)
(click any image to enlarge)
;)
;)
;)
Here are a few alternatives to the XBit level shifter including an option without the DB9 connector and a USB option.
- https://www.sparkfun.com/products/11189
- https://www.sparkfun.com/products/449
- https://www.sparkfun.com/products/718
(NOTE: I have not personally used or tested these alternative options but based on the specs they should work just fine. Also when connecting a level shifter, please take note of the source voltage required to drive the level shifter. Some are 5VDC only and other may support 3.3VDC. Make sure to get one that support 3.3 VDC and connect it to appropriate 3.3 VDC source voltage pin on the P1 header!)
Connecting to the Raspberry Pi Console
Both the Debian "Squeeze" and Raspian "Wheezy" images by default include support for accessing the shell by connecting a terminal emulation program to the serial port. Just connect a straight thru serial cable (not a null modem cable) between the computer and your new DB9 port on your Raspberry Pi. Open a terminal emulation software such as Hyperterminal, Procom Plus, or Indigo Terminal Emulator and connect to the serial port using settings "115200, N, 8, 1". You may need to press the enter key a time or two to see the prompt. Authenticate using your credentials and you are good to go.
Enjoy the world of serial connectivity!
 Robert Savage
Use the Serial Port in Software
http://www.irrational.net/2012/04/19/using-the-raspberry-pis-serial-port/
Robert Savage
A new article has been posted that provides additional RS232 serial interface options, hardware, and wiring digrams: Raspberry Pi - RS232 Serial Interface Options (Revisit)
