Raspberry Pi - Programming Pi-Face with Java & Pi4J

Overview
I just got my hands on a Pi-Face expansion board for my Raspberry Pi. I purchased mine direct from Newark and it arrived is less than a week. My first objective was to get this board integrated into the Pi4J project and fully working with Java on my Raspberry Pi. This article covers installing the Pi-Face board, setting up the SPI communication driver, and demonstrates programming the Pi-Face in Java. With the Pi-Face Java API interface now available in the Pi4J libraries (in Pi4J version 0.0.5-SNAPSHOT and later) this makes it a breeze to program and work with in your own Java program.
Shipping List
- 1 @ Raspberry Pi (see this page for more Raspberry Pi related supplies)
- 1 @ Pi-Face (available on Amazon, CPC, Newark, Farnell)
Documentation
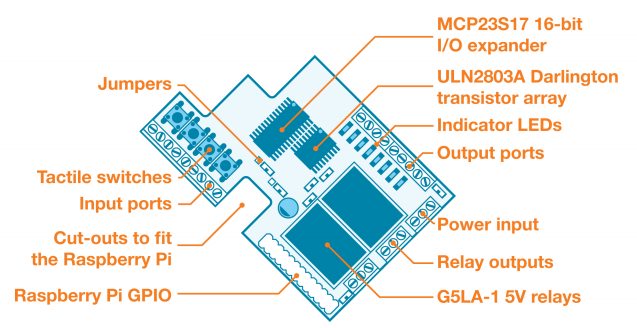
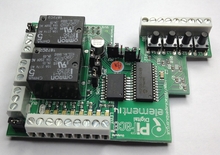
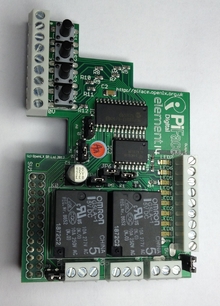
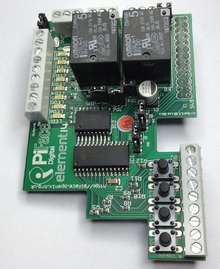
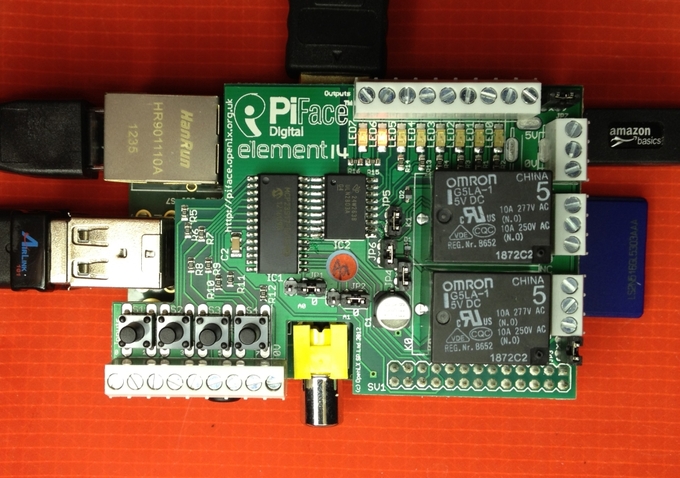
Board Layout/Features
- 2 mechanical relays (connected to outputs 1 and 2; can be disabled via jumpers)
- 4 momentary pushbutton PCB switches (connected to inputs 1-4)
- 8 digital inputs (sink to GND to activate each input pin; pulled-up via software)
- 8 open-collector outputs
- 8 LED indicators (for the 8 digital outputs)
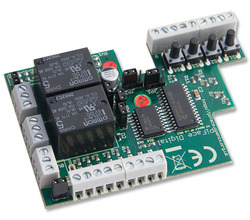
Photos
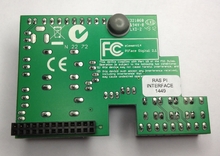
(Click any photo to enlarge.)
Hardware Installation
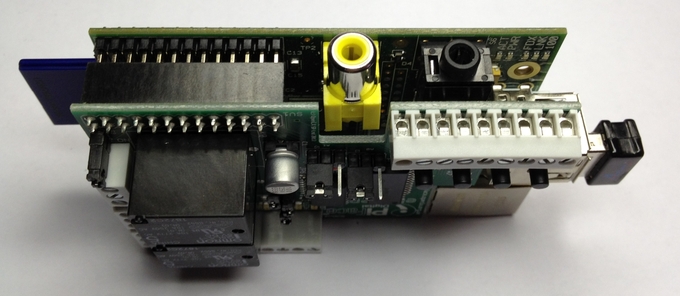
Installing the Pi-Face board is a snap. It literally takes just a few seconds. First, remove the power supply from your Raspberry Pi so that it is powered down while installing (or uninstalling) the Pi-Face board. With the Pi powered down, simply place the Pi-Face board directly on top of the Pi such that the header connector on the Pi-Face is aligned with and mates with the P1 header pins on the Raspberry Pi as shown in the photo below. Press the Pi-Face board down until the P1 header connector is fully seated.
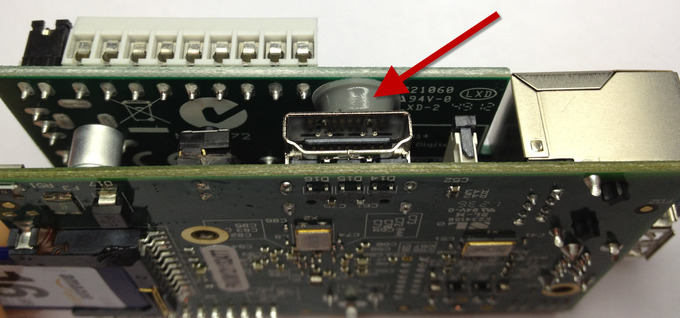
Note that on the opposite side there should be a rubber bumper attached to the Pi-Face that rests on top of the HDMI connector on the Raspberry Pi. This bumper prevents any electronics from shorting out between the Pi-Face and Raspberry Pi boards.
Driver Installation
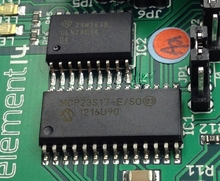
The Pi-Face expansion board uses a MCP23S17 16-Bit I/O Expander chip to perform all of its onboard functionality. The MCP23S17 chip uses SPI for communication between the Raspberry Pi and the Pi-Face board. The Raspberry Pi supports a SPI driver but it must be configured to enable it.
You can enable it for one time use by issuing the following two commands from the terminal (Note that if you reboot the system you will need to re-issue these command to enable the SPI driver again.):
   sudo modprobe spi_bcm2708
   sudo chown `id -u`.`id -g` /dev/spidev0.*
If you prefer to permanently load the SPI driver, then you will need to perform the following steps:
- Edit the /etc/modprobe.d/raspi-blacklist.conf using this command:
sudo nano /etc/modprobe.d/raspi-blacklist.conf
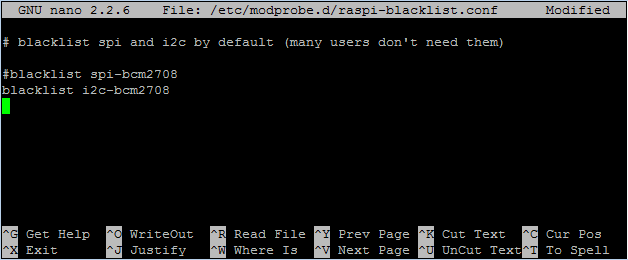
- Comment out the line "blacklist spi-bcm2708" by placing a "#" character at the beginning of the line. This will prevent the SPI driver from being blacklisted on reboot.
#blacklist spi-bcm2708
Save the file when your changes are complete (CTRL-O to save; CTRL-X to exit)
Here is what my blacklist file looks like:
- Reboot the Raspberry Pi for the settings to take effect.
sudo reboot
Programming
Now we are to the fun part .. programming in Java to interact with the Pi-Face board. The good news is that if you use the Pi4J libraries all the nitty-gritty hard work (SPI communication protocol for the chipset and state change monitoring threads) is already done for you. Pi4J has implemented the following new device interface and implementation classes to support the Pi-Face board:
- com.pi4j.device.piface.PiFace (Public Interface)
- com.pi4j.device.piface.PiFaceBase (Abstract Base Class)
- com.pi4j.device.piface.impl.PiFaceDevice (Public Implementation Class)
(Browse the com.pi4j.device.piface namespace here.)
These interfaces and classes expose much of the Pi-Face's capabilities using some of the newer Pi4J components interfaces such as Relay, Switch, and LED. In addition to the component interfaces, you can also access the raw GPIO pins if needed.
NOTE: You will need to include the following pi4j dependency JARs in your program and included on the classpath:
- pi4j-core.jar
- pi4j-device.jar
- pi4j-gpio-extension.jar
Example Java Program
The following is the Pi-Face example Java code that is now provided with the Pi4J installation and available as open-source in the Pi4J Github repository.
This sample implements the following logic:
- When switch 'S1' is pressed, relay 'K0' will turn ON
- When switch 'S1' is released, relay 'K0' will turn OFF
- When switch 'S2' is pressed, relay 'K1' will toggle states
- When switch 'S3' is pressed, 'LED02' will start blinking
- When switch 'S3' is released, 'LED02' will stop blinking and turn OFF
- When switch 'S4' is pressed, the cylon effect on 'LED03' to 'LED07' will speed up
- When switch 'S4' is pressed, the cylon effect on 'LED03' to 'LED07' will slow down
Installing, Compiling and Running The Sample
Follow the instructions on http://pi4j.com/install.html to install Pi4J and compile the included sample programs.
If you want to compile just this single example use the following commands:
cd /opt/pi4j/examples
javac -classpath .:classes:/opt/pi4j/lib/'*' -d . PiFaceExample.java
To run the sample, use the following command:
cd /opt/pi4j/examples
sudo java -classpath .:classes:/opt/pi4j/lib/'*' PiFaceExample


 Monday, February 25, 2013 at 7:25AM
Reader Comments (25)
Great video. I'd love see more on how to wire simple things like a light, fan, or sensor of some kind using the PiFace. There's barely any learning material for beginners with the device. It's frustrating knowing how to program but knowing how to actually wire up electronics. Thanks a lot for posting this!
Can you control the pi-face from a web browser? If so do you have a how to?
Excellent tutorial, the lights are flashing in sequence correctly but the buttons do not have any effect, I was wondering what you use to debug your java program? Eclipse is a little top heavy for the pi.
@James
For simple debugging on the Pi, I typically just use System.out.println() to output some debug info. Not elegant, but effective :-)
Thanks, Robert
@Nechako
Pi4J does not currently support a web service API. You could certainly write this, but its not provided out of the box. There may be other projects that include a web interface that support the PiFace hardware.
Thanks, Robert
Hi,
When switch 'S1' is pressed, relay 'K0' will turn ON
When switch 'S1' is released, relay 'K0' will turn OFF
When switch 'S2' is pressed, relay 'K1' will toggle states
dot no responding
What could it be?
dmes
[ 6.178190] bcm2708_spi bcm2708_spi.0: SPI Controller at 0x20204000 (irq 80)
Good night,
I wonder if you can help me in my project can trigger the outpus pi face however the event listener of inputs not working.
Have you ever encountered this kind of problem?
In the test program piface-emulater equipment work which proves that it is not a hardware problem.
Ma the example above events mundaca state input are not perceived.
I appreciate being able to help me much.
'Piface-emulator' works well, i test program 'button' of WiringPi. When running the sample through'll call 'button' example or 'piface-emulator', so everything works. Not need some inicialice SPI?
Hi
Outputs works fine, but inputs are not respondig. When I press the button nothing heppend.
Do you have a idea why?
Robert, thanks for all you example, they are grear.
So me does not work inputs responding
Robert, thank you for your reply
Unfortunately I have the same issue: inputs are not responding. The bouncy leds work, but the input is ignored.
Any idea, anyone?
Managed to get the example to work by downloading the pre v2 WiringPi (wiringPi-02a3bd8.tar.gz), this is due to the 0.5 release of Pi4J not supporting v2 yet. Many thanks Robert for a great example...
Brett, are you able to share the working JARs? I'm having trouble rebuilding the Pi4J JARs with the updated wiringPi, not sure what I'm doing wrong.
@Robert
Thanks for your tutorial !!
I had the same problem, the emulator worked, but java not.
So I tried it with python and hey, java works too!
This is my _workaround_ until pi4j works out of the box :)
First, go to http://piface.github.io/pifacedigitalio/index.html and take a look at installation and examples.
Make a directory where you want to download the code and go in it.
> mkdir tests
> cd tests
> git clone https://github.com/piface/pifacedigitalio
> git clone https://github.com/piface/pifacecommon
Now you have two new directories, pifacedigitalio and pifacecommon.
Go in both and enter
> python3 setup.py
Create a new file named initGpio.py with the following content:
p.init(False)
pfd = p.PiFaceDigital()
pfd.output_pins[0].value = 1 # can you her the relay?
pfd.input_pins[0].value
exit()
now restart your system..
> sudo reboot
login and from now on, you can initialize the gpio with
> python3 initGpio.py
start your example
> sudo java -jar YourExample.jar
and the buttons should work..
Have fun
Michael
I am also having the issue of the tactile buttons not responding. I have tried just doing a simple System.out.println on the state change, I have tried using an older version of wiringPi (wiringPi-02a3bd8.tar.gz as per Brett's suggestion), I have tried using a newer version of pi4j (1.0-SNAPSHOT), all without luck. Brand new Pi, Brand new PiFace.
I wonder if there is an issue with SPI address or channel on some RPi revisions? Quite frustrating when a simple example does not work ;c
@Drew,
I have just uploaded a new 1.0-SNAPSHOT build. Can you try this new version and see if the input events for the buttons start working? They should be working now.
Thanks, Robert
@Robert, sure thing. With the latest wiringPi or with wiringPi-02a3bd8.tar.gz? Is there any other debug info I could provide for you?
Drew
@Robert, just gave it a shot and it is working! Now have the cli feedback, LED and relay interaction. Just out of curiosity, what changed in the 1.0 snapshot since during the week?
@Drew,
Thanks for testing this -- I just wanted some independent verification to confirm the fix.
Asher Waldfogel posted (in this forum thread: http://www.raspberrypi.org/phpBB3/viewtopic.php?f=81&t=35069&sid=51ad6a59dd1375c1724340a54b482ec7) some steps he performed to get it working. I was able to use the information he provided to dig into the chip protocol and figure out what was going on to cause the issue.
It turned out to be that the GPIO interrupt in the chip was flagged somehow during the initialization procedure and since it was not getting cleared/reset so the GPIO pin change monitoring logic was not working correctly. I just added some additional reads to read and reset the interrupts at the end if the initialization steps.
Here is the defect ticket:
https://github.com/Pi4J/pi4j/issues/53
And here is the changeset that includes this fix:
https://github.com/Pi4J/pi4j/commit/cf7422b550453ab122c0568877b8de81f3d46903
Thanks, Robert
Hi,
I tried all the things but inputs for aint working.
I tried older wiringPi, 1.0-SNAPSHOT, both examples. The dont work.
There is no problem with python code, it just works.
Any help?