
;) The Edimax EW-7811Un 150 Mbps Wireless 802.11bgn USB Adapter is a popular choice for use with the Raspberry Pi. Here is what this little adapter has going for it:
The Edimax EW-7811Un 150 Mbps Wireless 802.11bgn USB Adapter is a popular choice for use with the Raspberry Pi. Here is what this little adapter has going for it:
- It is on the approved list of known working peripherals.

- Works directly attached to the Raspberry Pi USB port.
(Some network adapters used with the Pi require an external USB powered hub) - The latest Raspbian distributions come with the driver for this adapter pre-installed.
- It's tiny! It does not block access to the second USB port on the Raspberry Pi (Model B).
- Supports 150 Mbps 802.11n
- Backward compatible with 802.11b/g
- Internal chip antenna
- Affordable / Reasonably priced at $8.79 USD (Buy it here)
Shopping List
- 1 @ Raspberry Pi (see this page for more Raspberry Pi related supplies)
- 1 @ Edimax EW-7811Un 150 Mbps Wireless 11n Nano Size USB Adapter
Photos
(Click photo to enlarge.);)
;)
;)
;)
Packaging / Specs
(Click image to enlarge.)
;)
;)
Installation
The latest Raspian distribution (Raspbian “wheezy” 2012-09-18) already includes the drivers for this adapter pre-installed. This greatly simplifies the installation. (If you are using a different distribution or an older distribution you may have to install the Linux driver for the Realtek RTL8192CU driver.)
Insert the Edimax USB adapter into your Raspberry Pi's USB port. Next, lets make sure that the Raspberry Pi recognizes the device. Use the following command to verify that the Pi "sees" the Edimax WiFi adapter.
lsusb

You should see the Edimax EW-7811Un device listed in the output.
Now that we have verified that the Edimax adapter is recognized, lets check to make sure the kernel driver is loaded. Use the following command to list the kernel modules:
lsmod
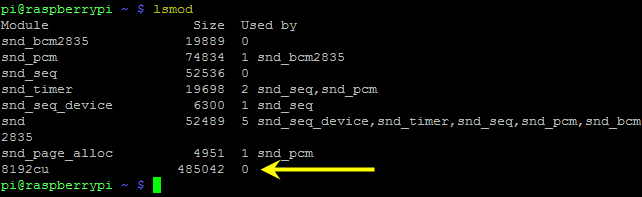
You should see the "8192cu" kernel module loaded. If not, try removing and re-inserting the Edimax USB adapter.
As a final validation check to make sure that the Edimax is ready to use, send the "iwconfig" command to display a listing of the current wireless network configuration.
iwconfig
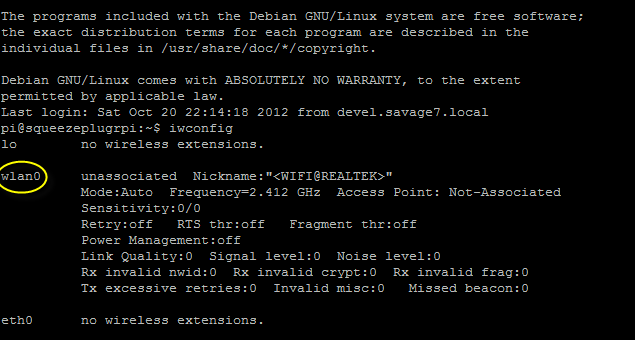
We are just looking to ensure that the "wlan0" adapter is present.
Now we are ready to move on to the configuration steps.
Configuration
One you have installed the adapter, verified the kernel driver is loaded, and confirmed that a wireless network interface ("wlan0") is available, you will need to configure the wireless connection settings to securely connect to your wireless network.
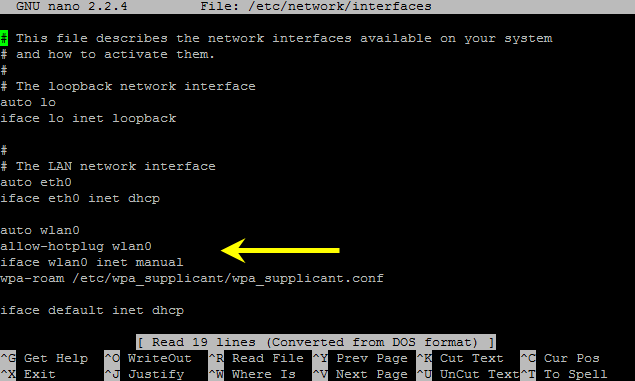
First, let's open the network interfaces configuration file for editing using the following command:
sudo nano /etc/network/interfaces
Make sure the following lines are added to (or un-commented in) your file
auto wlan0
allow-hotplug wlan0
iface wlan0 inet manual
wpa-roam /etc/wpa_supplicant/wpa_supplicant.conf
After modifying the network interface configuration file, we need to create the wireless configuration file. Use the following command to create (or edit) this file.
sudo nano /etc/wpa_supplicant/wpa_supplicant.conf
Add the following data to this wireless configuration file. (Replace the "_SSID_" and "_WPA_SHARED_KEY_" text with your actual SSID and WPA key values.)
network={
ssid="_SSID_"
proto=RSN
key_mgmt=WPA-PSK
pairwise=CCMP TKIP
group=CCMP TKIP
psk="_WPA_SHARED_KEY_"
}
(Note: This configuration is intended for WPA protected wireless networks.)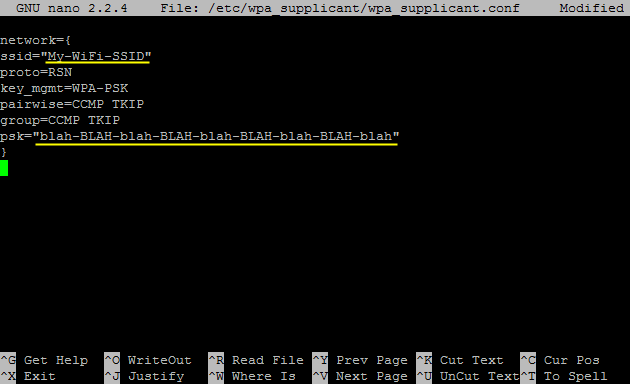
Once the configuration files are complete, use the following command to restart the wireless adapter / interface.
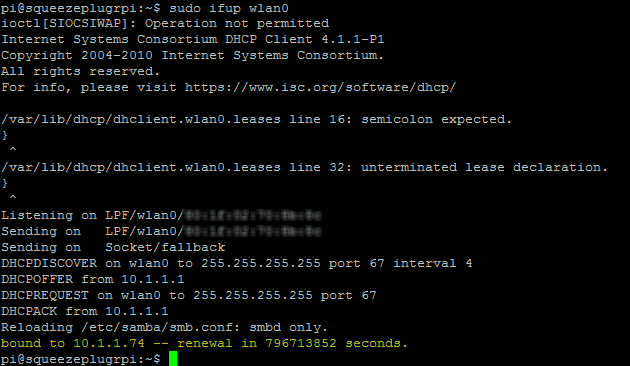
sudo ifup wlan0
This command will restart the network interface and use the newly defined interface and wireless settings to establish a wireless network connection. Assuming the configuration is correct, the wlan0 interface should connect and acquire an IP address.
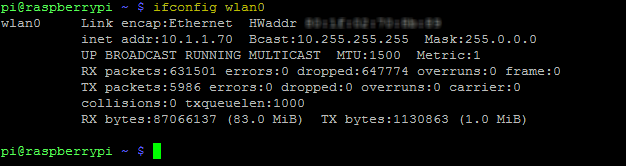
For connection verification and an alternate way to see your assigned IP address, use the following command to list the network configuration:
ifconfig wlan0
If you have any trouble getting connected using the "ifup" command, verify your wireless connection settings and reboot your Raspberry Pi. If you have the Raspberry Pi connected to a display you can watch the Pi attempt the connection during startup.
That's it, hopefully you now have a WiFiPi.
* Raspberry Pi is a trademark of the Raspberry Pi foundation.
Also check out the installation instructions for installing and configuring the
>> Airlink 101 Wireless N 150 Ultra Mini-USB Adapter (AWLL5099)
;)
The following article is an excellent resource describing many different wireless network configurations for Debian based distributions: