
;)
The Raspberry Pi is a revolutionary step forward in bringing low cost embedded computing to the masses. Designed as an educational learning tool and the "B" model priced at only $35 USD, the Raspberry Pi makes a great little device for DIYers and hobbyists.
This article will provide the necessary information on the basic supplies needed and instructions on getting started with your new Raspberry Pi.
Supplies
- Raspberry Pi - Model B
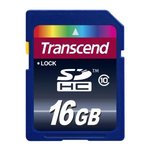
- SDHC Card (4 GB or more; Preferably Class 10)
- Micro USB Cable
- Power Supply (5 volt with at least 700mA)
- HDMI Cable
- USB Keyboard
- USB Mouse
- Ethernet Cable (optional)
- Case / Enclosure (optional)
A shopping list with direct linked items is available via this post.

Power
To power the Raspberry Pi you will need a 5 VDC power supply with a minimum of 700 mA and micro USB connector to plug into the micros USB port on the board.
;)
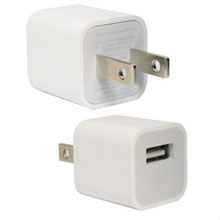
If you have an extra Apple iPhone charger laying around, this makes a perfect power supply for the Raspberry Pi. The Apple iPhone charger is 5VDC @ 1A (1000mA). Using the Apple iPhone charger or similar USB charger you will still need a USB to micro USB adapter (A Male to Micro B). I used this AmazonBasics USB Cable - 2.0 A Male to Micro B (6 Feet / 1.8 Meters)
;)
NOTE:
Do not attempt to use your computer's USB port to power the Raspberry Pi.
Video/Display
The Raspberry Pi includes a HDMI port to connect the device to a computer or TV monitor. If you monitor does not accept a HDMI connection directly, then you many need a HDMI to DVI or HDMI to display port adapter/cable. I am using this HDMI/DVI adapter cable that I picked up from Amazon: Eforcity Black 6FT /2 Meter HDMI Male to DVI Male Cable
;)
Keyboard/Mouse
You can plug in just about any standard USB keyboard and mouse. I am using a USB to PS2 adapter with an old PS2 keyboard and PS2 mouse.
;)
Network Connectivity
You will need a network (CAT-5) ethernet cable to connect the Raspberry Pi to you network switch/hub/router/residential gateway.
;)
Installing OS Image
Before booting your Raspberry Pi for the first time, you will need to flash an operating system to a SD card using a Windows, Apple Mac. or other Linux computer with an SD card reader. You can download your choice of operating system image from the main Raspberry Pi download page:
http://www.raspberrypi.org/downloads
Or from the Raspberry Pi Wiki distributions page:
http://elinux.org/RaspberryPiBoardDistributions
The following page includes detailed instructions based on your desktop operating system for flashing the image to the SD card.
http://elinux.org/RPi_Easy_SD_Card_Setup
Once your SD card has been flashed successfully, you are ready to insert it into the Raspberry Pi and boot it up.
;)
NOTE: If you are planning on running Java-based applications and want to run using the Oracle JRE, then you should use the "Debian ARM 2012-04-19 (Squeeze)" distribution at this time instead of the newer "2012-08-07 (raspbian/wheezy)" distribution. The newer distribution supports hardware floating point, but is incompatible with the Oracle JRE at this time.
Booting & Initial Configuration
On inital boot, depending on the image you load, the Raspberry Pi may reboot one or more times while setting itself up. Once complete a login prompt should be provided allowing you to enter credentials to access the console. The login credentials vary depending on which distribution you have loaded, but the default credentials for Raspbian and Debian distributions are username "pi" and password "raspberry".
If you are using the Raspbian "Wheezy" image, the raspi-config configuration utility should load on the first boot and allow you to select your local configuration options.
If you are using the Debian "Squeeze" image, you will need to run the following commands to configure the system your your locale, keyboard and timezone.
sudo dpkg-reconfigure locales
sudo dpkg-reconfigure keyboard-configuration
sudo dpkg-reconfigure tzdata
For information on other distributions, please see this page: http://elinux.org/RaspberryPiBoardDistributions
Starting X (GUI)
Run the following command from the console to start the graphical user interface.
startx
Now you are up and running .. have fun with your Raspberry Pi!
* Raspberry Pi is a trademark of the Raspberry Pi foundation.